Overview
Stripe Payment Terminal WordPress allows you to have a quick & easy credit card payment terminal for your clients processed by stripe.com on your wordpress site. Installation and configuration of the script takes less than 5 minutes (however you do need to have SSL and stripe.com account).
There are several options to pay.
– customers can select service from a list
– customers can input price themselves
– customers can be directed to pay for particular service
– customers can be directed to payment page with pre-set amount
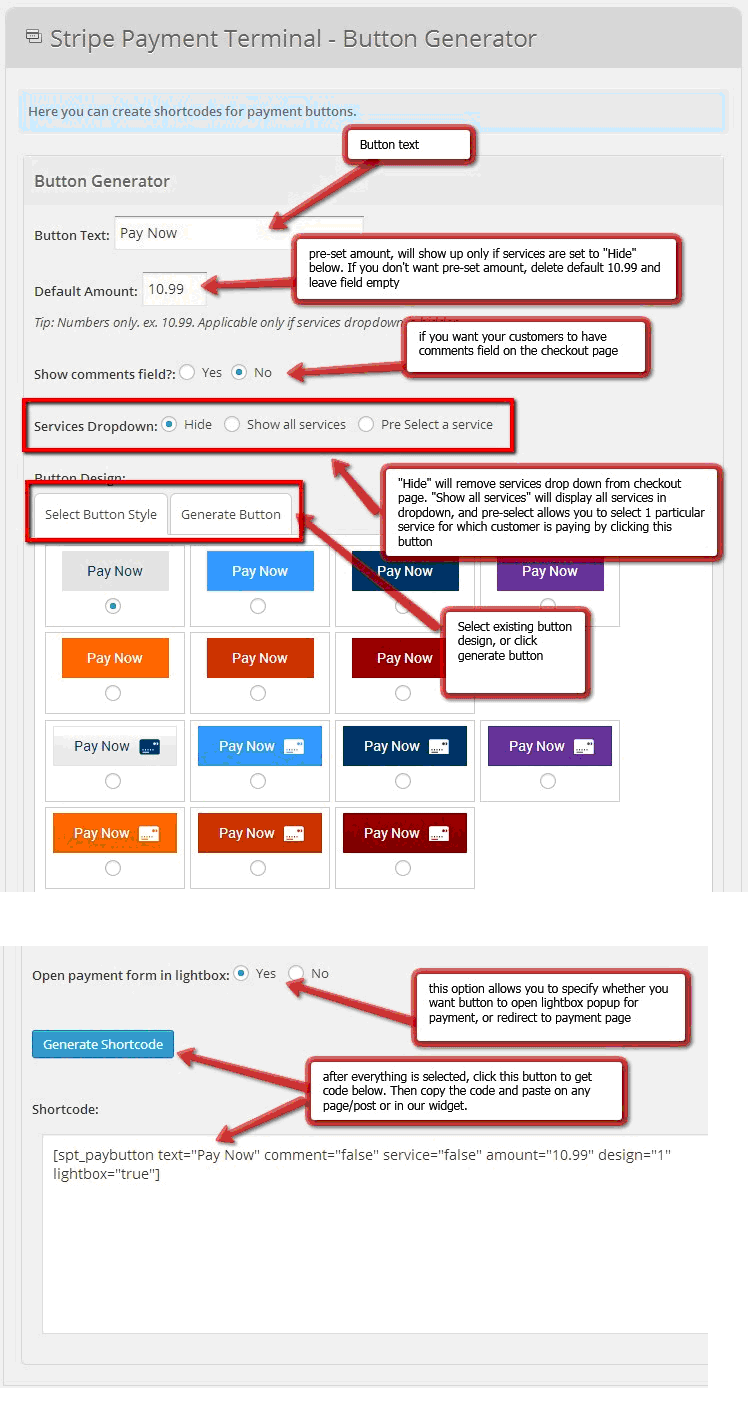
You need to generate button (with many different options/settings available to select from) and then you can place it anywhere on your wordpress site, in page or in post. We’ve also included a widget area, which accepts button code too, so you can use widget to place same button.
Server Requirements
These are the system requirements in order to use Stripe Payment Terminal WordPress. If you are unsure whether your server meets these requirements, contact your hosting company.
– WordPress site (preferably 3.8+)
– Stripe.com account
– SSL certificate ( if you don’t have one, you can purchase it here. After purchasing certificate you will need to contact your hosting provider or server administrator to install the certificate for you)
– cURL must be enabled
Installation
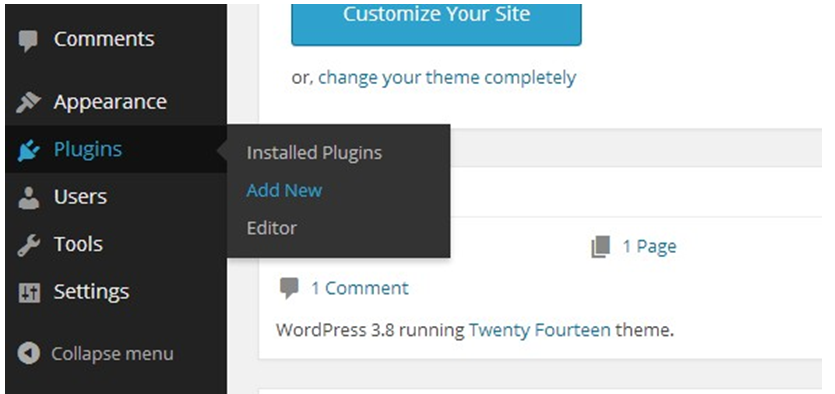
Installation is really easy. All you need to do is login to your wordpress site as admin, go to plugins and add new plugin:
Step 1: Plugins -> Add New
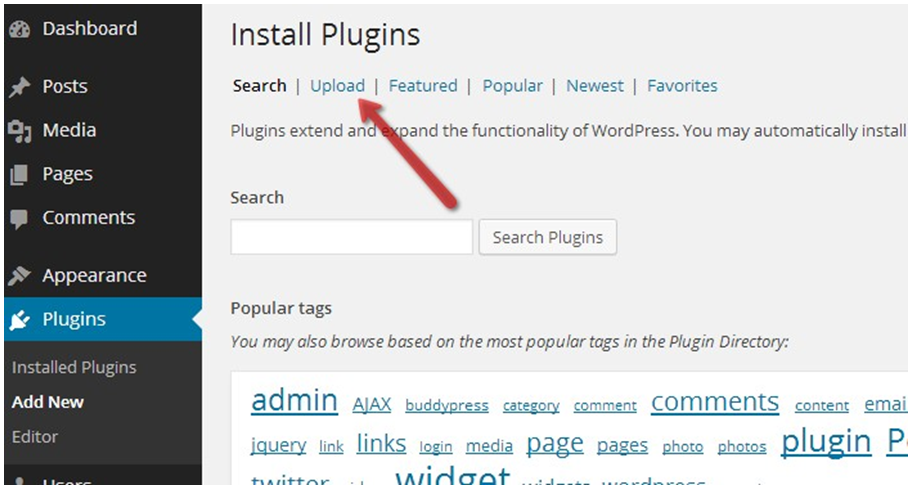
Step 2: Select “upload” link
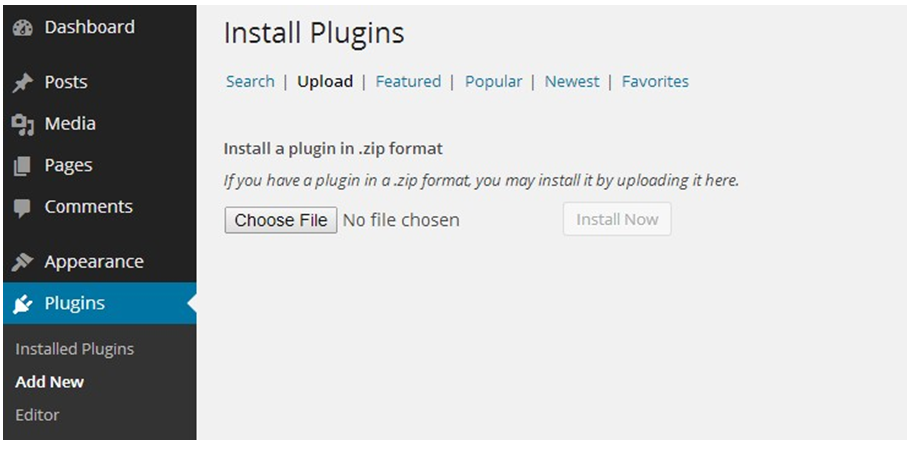
Step 3: Now, click “choose file”, select the ZIP archive which you downloaded from CodeCanyon and then click INSTALL NOW.
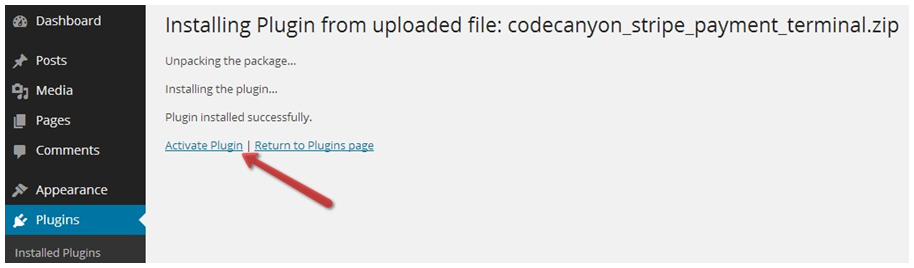
Step 4: After upload finishes you will see below screen. Press “activate plugin”:
You will now see a new menu item in main wordpress navigation on the left side :
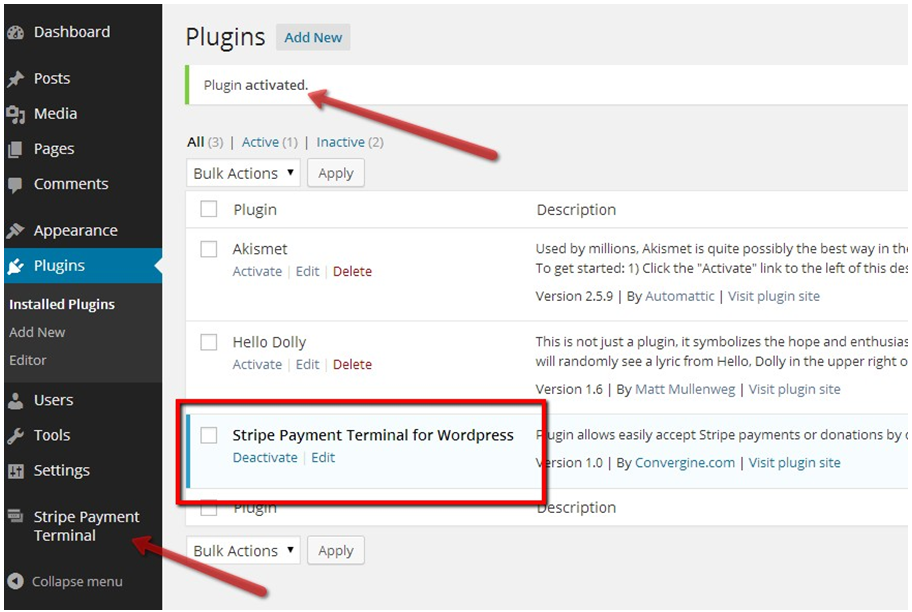
Installation complete! Proceed to configuration section.
Note: You can also upload plugin in the old-fashioned way, through the FTP, by uploading plugin folder (stripe_payment_terminal) to your wordpress plugins folder (inside the wp-content folder).
Configuration
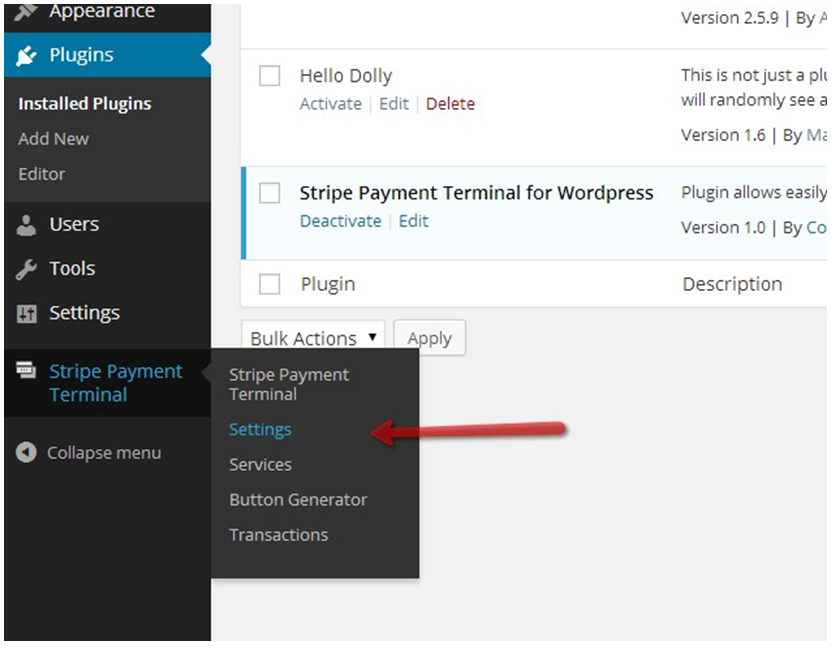
Right after the installation – you will need to configure your Stripe Payment Terminal WordPress by clicking “Stripe Payment Terminal” -> “Settings” menu item:
You will then see license key page. You need to enter your CODECANYON USERNAME and
ITEM PURCHASE CODE for our product.
(Click here to read how to get item purchase code)

When finished entering username and license key (=item purchase code) – click “Save License Key”
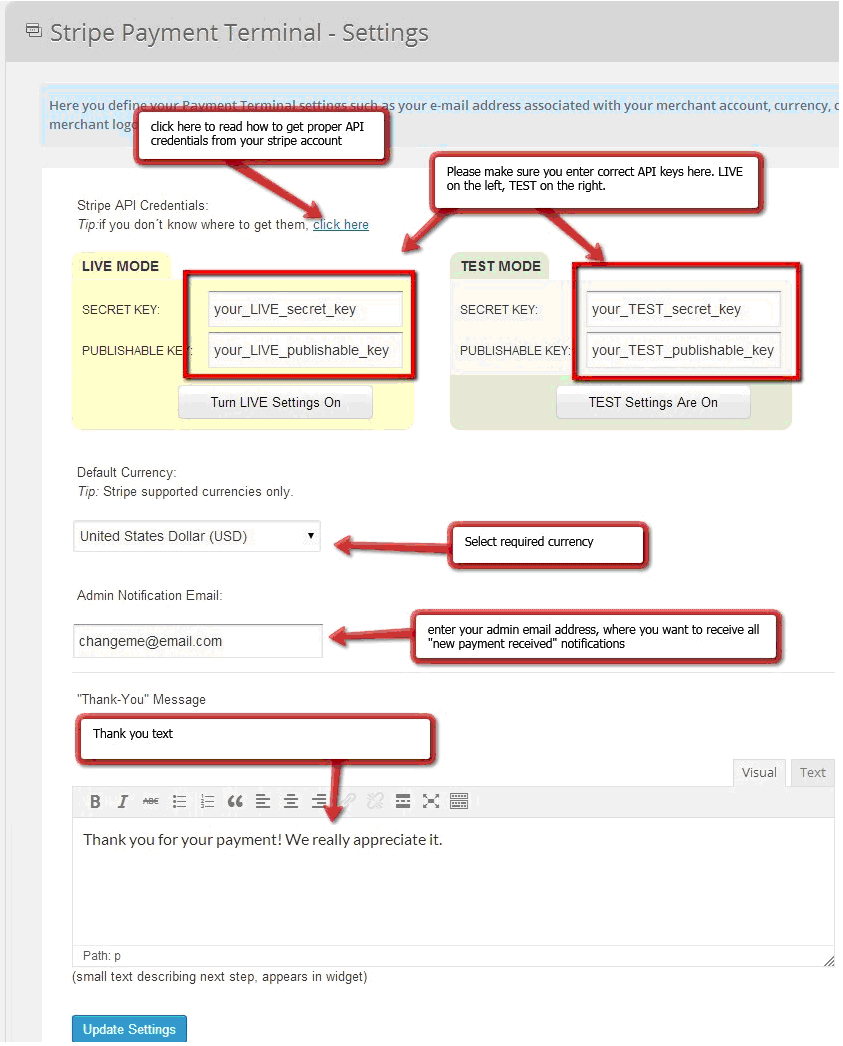
You will then be presented with following screen.
Dashboard
When you’ll click on “Stripe Payment Terminal” menu item – you will land on the default dashboard of our plugin, which shows you basic information of 15 latest transactions on your site.
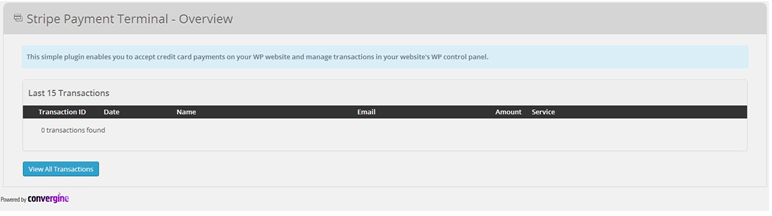
The blue button at the end of the screen will take you to all transactions.
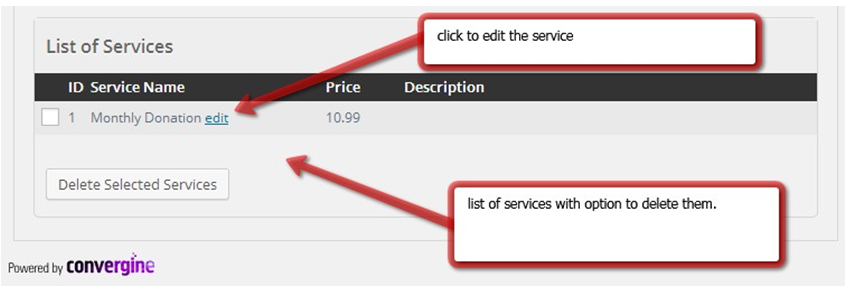
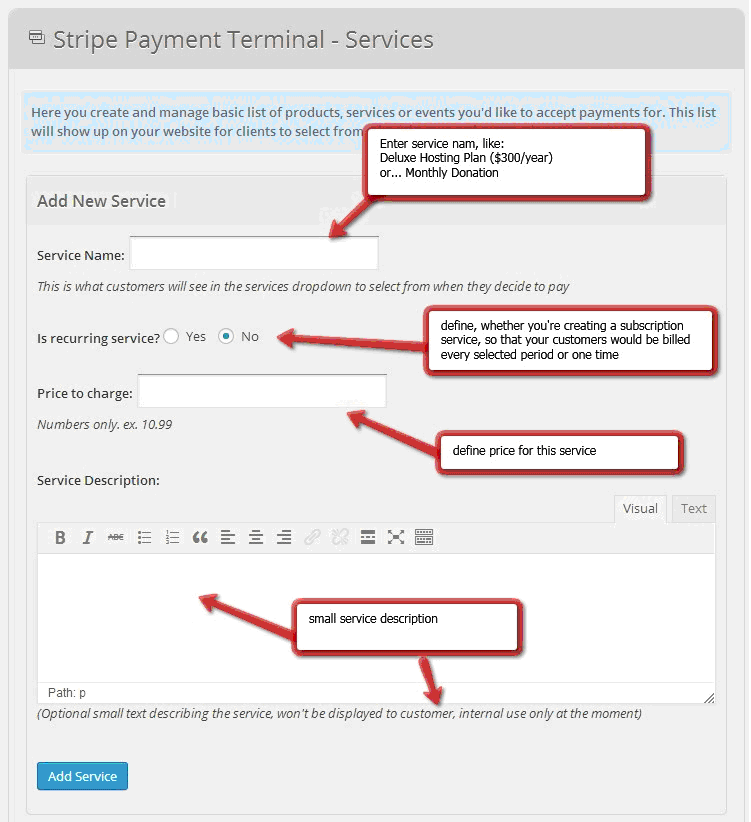
Services
Services are quick way of storing some pre-defined charge templates for your button generator. When you will be creating your buttons in next section – you will see that you can select services which you already created in this section.
Button Generator
Transactions

Upgrading
At the moment, there is no automatic plugin update from within wordpress administration for this product.
To update to the latest version (when you receive a notification from codecanyon for example)
– you just need to download the file from codecanyon downloads area, then reupload all the files through FTP (please use FTP client, something like FileZilla will work just fine * Filezilla- project.org )
If you will deactivate/delete the plugin through wp admin area and then upload new one also through wp admin area – that will work as well, however, please note that all settings and widgets will be dropped, and you will need to edit those again. Buttons and Services will stay intact though.
FAQ & Common Errors
You can find all the frequently asked questions and common errors/solutions for bookingwizz in this section
Technical Support
We provide courtesy support for all our products to our valued customers within 48-72 hours after receiving the request through our support ticketing system. Each purchase comes with 6 months support time. After that – you may either purchase extended support through the marketplace or purchase premium support with us.
If you need any help regarding the installation of the script or any other question please read through respective product documentation first and if solution is not found – open support ticket (please note, you will need to register account and you will be required to provide your license key (item purchase code) during the registration process, which will then be validated through CodeCanyon API. If your support period has expired you may either extend it with Envato or purchasepremium support from us).
Please note that we do not provide support by email. Any email related to support and not to pre-sales questions will be replied to after any other support tickets are resolved and in general will be directed to open a ticket, since we need to validate your purchase/support period validity.
For more details about our support policy and terms of service (including what is and is not included in Basic Support) click here.
Our business hours are Monday – Friday: 9:00am – 6:00pm (EST), and support is provided only at that time. Upon opening a ticket, we make it our goal to respond within 48-72 hours, however depending on the issue you’re having it may take a bit longer, but in any case we will address the issue within specified period of time with at least “resolution time” in reply.
Changelog
v1.0 (26 January 2014)
– initial version released
v1.1 (10 March 2014)
– fixed error for amounts >999
– fixed display of transactions in overview
– fixed transactions paging
– removed all php shorttags
– mktime() fix
– current month/year card validation fix
v1.2 (17 February 2015)
– minor bug fixes release
v1.3 (1 July 2015)
– replaced all mysql queries with wpdb for compatibility on servers with PHP 5.5+
– added option to change email notifications sender name and email in settings
– added new currencies supported by stripe
– added option to specify thank you page URL per button
– added paypal-standard redirect as payment option
– prettyPhoto library updated to v3.1.6 (security update)
– recurring services return to thank you page fix
– fixed option for customers to be able to enter amount
– added option for customers to cancel subscription through link in the email
v1.4 (28 October 2016)
– non-existent service ID’s will now display and error
– updated Stripe library to latest available version – 4.1.1
– includes TLS v1.2 files (if you have issues processing live transactions – you must update)
Sources & Credits
We’ve used the following images, icons or other files as listed.
– FontAwesome library – http://www.fontawesome.io
– jQuery Library – http://www.jquery.com
– jQuery prettyPhoto – http://www.no-margin-for-errors.com/projects/prettyphoto-jquery-lightbox- clone/
– jQuery Spectrum colorpicker by Brian Grinstead http://bgrins.github.io/spectrum/
– Roboto Font by Christian Robertson http://www.google.com/fonts/specimen/Roboto
– jQuery UI Library – http://www.jqueryui.com
– jQuery Tools – http://jquerytools.org/
Once again, thank you so much for purchasing our product and we hope you will enjoy using it!

